Lucie ​Makes, Bakes, Creates.
  • Home
    • Events
  • Shop
    • Cookie Cutters >
      • View All Cutters
      • Baby Shower Collection
      • Bridal & Wedding Collection
      • Cars & Trucks
      • Champagne Bottles & Beverages
      • Fashion & Accessories
      • Autumn & Halloween
      • Hanukkah
      • Christmas Season
      • Hearts, Love & Valentines
      • Spring, Easter, & St. Paddy's
      • Summer & Tropical
      • Animals & Insects
      • Tiles, Plaques, & Shapes
      • SUGAR BOX Exclusives
      • STL Cutters
    • Embossed Parchment Paper
    • Decorating Supplies
    • Workbooks & Graphics
    • MiniCake Stands >
      • MiniCake Stands
      • Prototypes & Discounts
      • STL Cake Stand Files
    • STL LIBRARY >
      • STL Cutters
      • STL Cake Stands
      • STL Cookie Display Stands
      • STL Mold Files
    • Flavourings
    • My Recipes
    • Amazon Recommendations
    • Other Amazing Online Shops!
  • Cookie Classes
    • Workbooks & Graphics
    • Free Tutorials
    • Easter & Springtime Classes & Guides
    • Summertime Classes & Guides
    • Autumn & Halloween Classes & Guides
    • Winter & Christmas Classes & Guides
    • Champagne & Liquor
    • Fashion Classes & Guides
    • Portrait Classes & Guides
    • 3D Printing & Cookie Preservation
  • Content Creation
  • Custom Cookies
  • Blog

Homemade Fancy Fudge!

7/19/2021

0 Comments

 
Picture
​Here's the recipe I used for my vanilla-raspberry homemade fudge!

  • 1 tablespoon butter
  • 3 cups granulated sugar
  • 1.5 cups heavy cream
  • ¼ cup light corn syrup
  • ¼ teaspoon salt
  • 1 tablespoon vanilla
  • 2 tbsp freeze-dried raspberry powder (or strawberry!), plus extra for topping off the fudge with.
  • Colour Mill oil-based colouring
  • Fancy Sprinkles Prism Powder, Glitter, and Sprinkle blends! (Use code LUCIEBAKES15 for 15% off!)

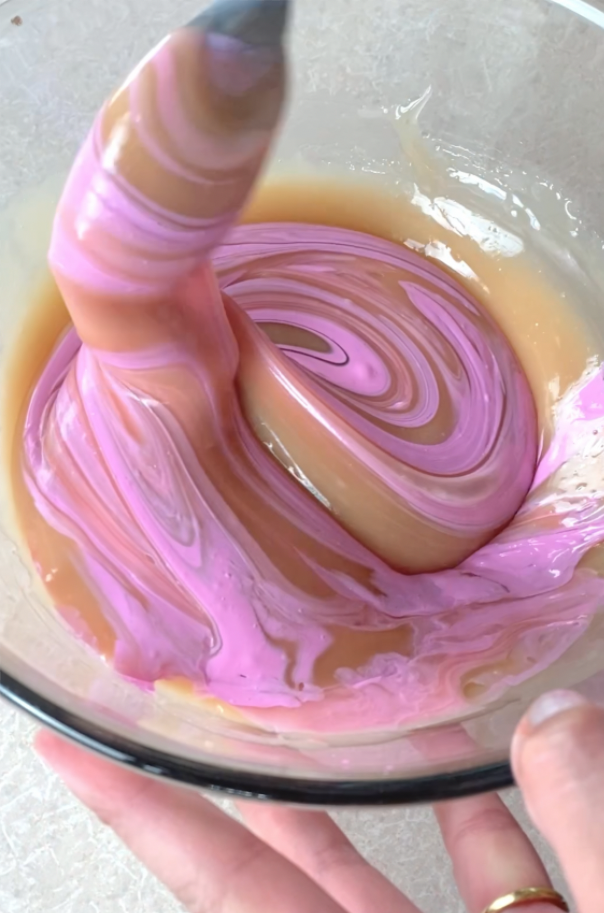
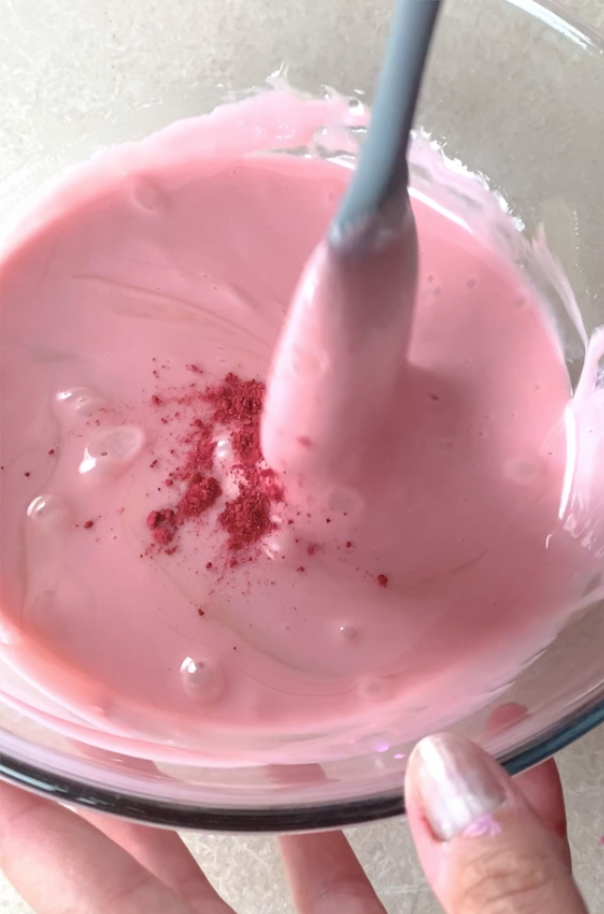
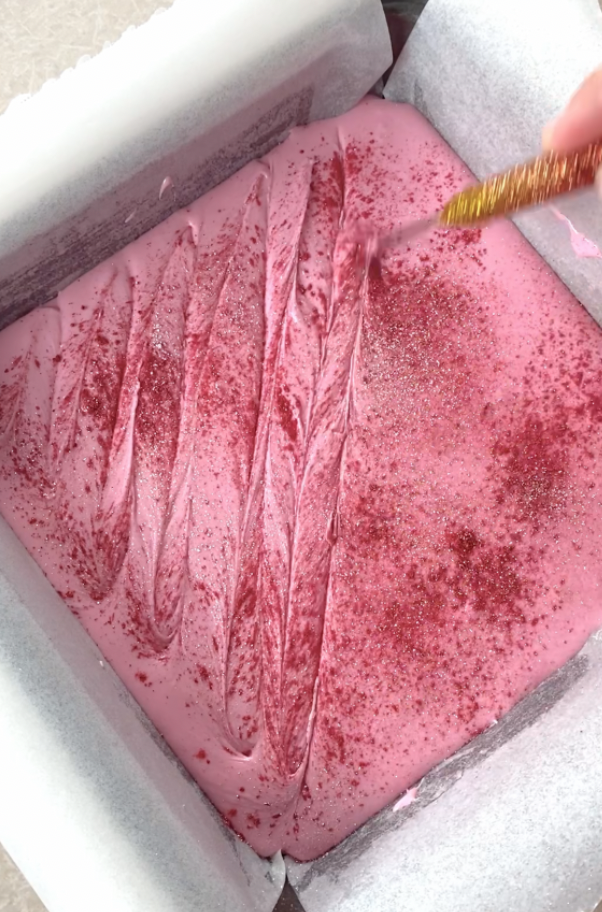
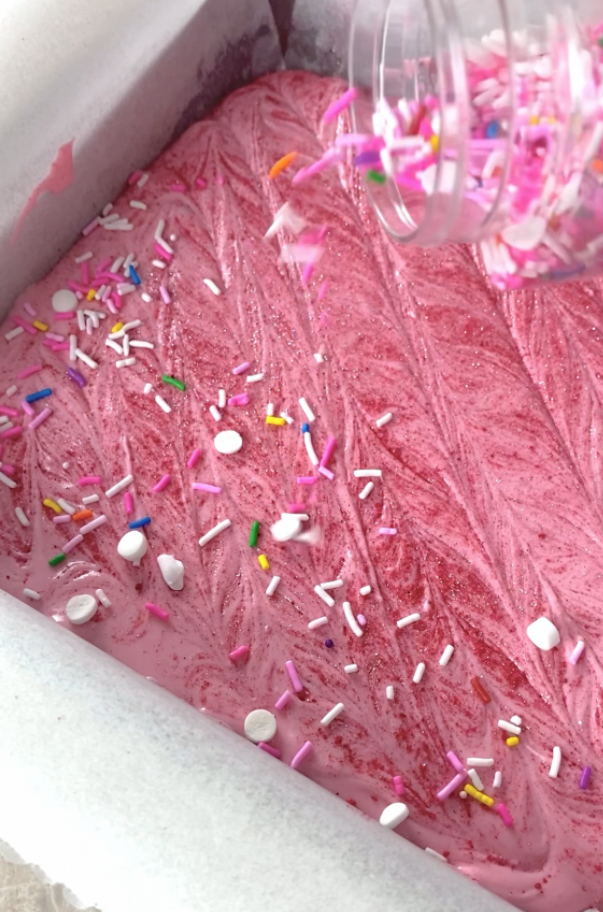
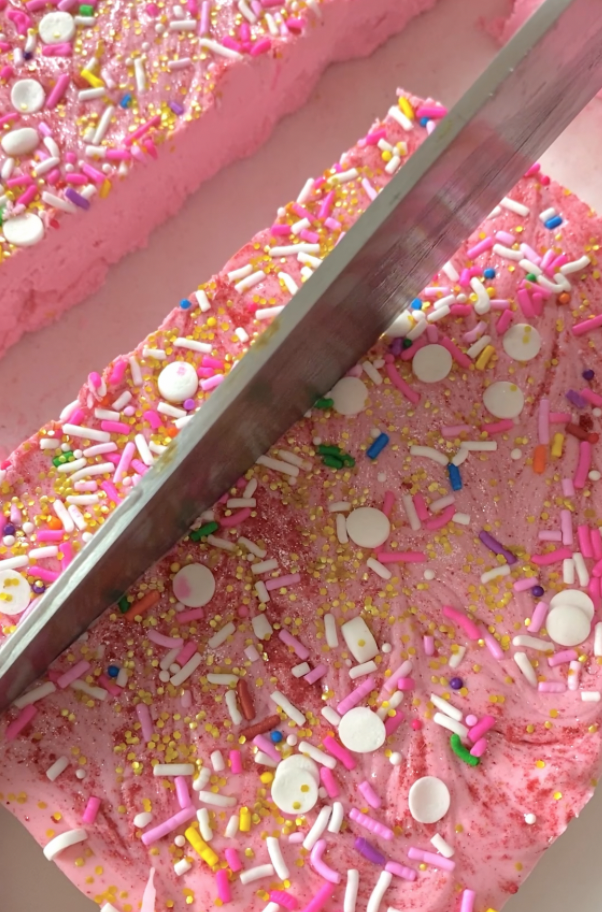
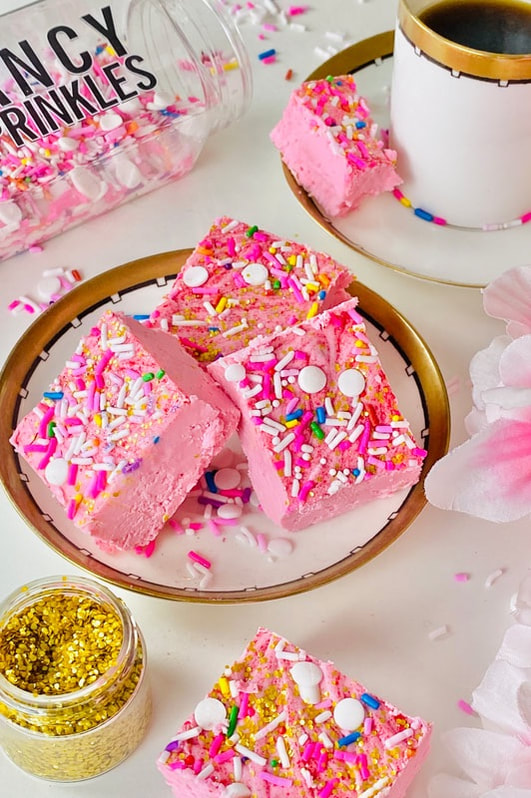
Grease a round or square cake pan (8x8), and line with parchment paper. Alternatively, you can use silicone molds/pans for your fudge! Grab a microwaveable glass bowl and place it on a cooling rack near the stove. Add 1 tbsp butter and the vanilla to the bowl.

Add sugar, cream, corn syrup, and salt to a medium pot, and heat on medium-low. Use a pastry brush and water to continuously wet down the sides of the pots to avoid sugar crystals from forming, alternating between wetting down the pot and stirring the mixture with a small silicone spatula. After about 5 minutes the sugar will have fully dissolved. Remove the silicone spatula from the mixture and place to the side.

Place your candy thermometer into the mixture and prop against the side of the pot. Increase the temperature slightly (about medium-high), and allow to boil without stirring at all. Once the mixture reaches 240 F, remove from the stove and pour into the glass bowl containing the butter and vanilla. Do not scrape the pot, just let the mixture pour into the bowl. Add the thermometer back into the mixture in the glass bowl. Do not mix the fudge at this point, allow it to cool until the thermometer reaches 110 F. This will take about 1.5-2 hours.

Once it's cooled down, add the Colour Mill colouring to your fudge, grab your silicone spatula and begin to stir your fudge mixture. Add more colouring if necessary, and add in your 2 tbsp freeze-dried raspberry powder. Stir for about 10-15 minutes (you can take breaks!) The more you stir your cooling fudge, the smoother and less grainy the fudge will be when it sets. Transfer the fudge to your lined cake pan or silicone molds, and decorate the top with extra freeze-dried raspberry powder, prism powder, glitter, and sprinkles!

Let it rest on the counter for an additional hour, and then transfer to the refrigerator for 8 hours (or overnight)! Once it's set, pop it out of the molds or the cake pan, and use a sharp, greased knife to slice into bite-sized pieces!


Picture
Picture
Picture
Picture
Picture
Picture
0 Comments

Your comment will be posted after it is approved.


Leave a Reply.

    Archives

    May 2022
    July 2021
    March 2021
    May 2020
    April 2020
    March 2020
    February 2020
    December 2019
    November 2019

    Categories

    All

    RSS Feed

© 2023 Lucie Radcliffe Design 
  • Home
    • Events
  • Shop
    • Cookie Cutters >
      • View All Cutters
      • Baby Shower Collection
      • Bridal & Wedding Collection
      • Cars & Trucks
      • Champagne Bottles & Beverages
      • Fashion & Accessories
      • Autumn & Halloween
      • Hanukkah
      • Christmas Season
      • Hearts, Love & Valentines
      • Spring, Easter, & St. Paddy's
      • Summer & Tropical
      • Animals & Insects
      • Tiles, Plaques, & Shapes
      • SUGAR BOX Exclusives
      • STL Cutters
    • Embossed Parchment Paper
    • Decorating Supplies
    • Workbooks & Graphics
    • MiniCake Stands >
      • MiniCake Stands
      • Prototypes & Discounts
      • STL Cake Stand Files
    • STL LIBRARY >
      • STL Cutters
      • STL Cake Stands
      • STL Cookie Display Stands
      • STL Mold Files
    • Flavourings
    • My Recipes
    • Amazon Recommendations
    • Other Amazing Online Shops!
  • Cookie Classes
    • Workbooks & Graphics
    • Free Tutorials
    • Easter & Springtime Classes & Guides
    • Summertime Classes & Guides
    • Autumn & Halloween Classes & Guides
    • Winter & Christmas Classes & Guides
    • Champagne & Liquor
    • Fashion Classes & Guides
    • Portrait Classes & Guides
    • 3D Printing & Cookie Preservation
  • Content Creation
  • Custom Cookies
  • Blog